Wednesday, July 13, 2011

Cascading IF-ELSE-ELSEIF A.K.A. Nested IF-ELSE Statements in a SSIS Expression

Today it will be a concise post, but I hope quite helpful and informative.

As most SSIS developers know SSIS Expressions are used to drive several key tidbits of a package components as the Conditional Split, Package Variables value assignments, Derived Column Transformation, form a SQL statement for Execute SQL task, drive precedence constraints, set package properties as connection string for example and more. So it is hard to underestimate the importance of the SSIS Expressions for a SSIS developer.

However, the SSIS expressions look hard to use for some beginners yet, feel un-natural to most people. This fact does not undermine the power and flexibility of the SSIS Expression. The only hard to swallow portion in my opinion is the code bloat versa editing space ratio that limits the effectiveness of writing long expressions. Luckily, there is a free tool to help: SSIS Expression Editor & Tester! I do not see any dramatic improvements in regard to the SSIS Expression in the forthcoming SQL Server “Denali”, but it will add a number of features that made me excited, perhaps I shall dedicate a separate post on this subject, but I will mention one: Expression Task. This task will help to assign a result of an expression to a variable. So the SSIS Expressions are here to stay and important to know.

And now I will share the most commonly asked question on MSDN SSIS forum: “how do I handle or process multiple IF-ELSE conditions”?

The answer is it is simple!

As we know, the conditional statement in SSIS Expression has the following notation:

«boolean_test» ? «true_result» : «false_result»


The trick is the right part can accept yet another [nested] IF-ELSE, and then more:


@[User::MyStringVar] == "TEST1" ? "IT WAS TEST1": 
@[User::MyStringVar] == "TEST2" ? "IT WAS TEST2": 
@[User::MyStringVar] == "TEST3" ? "IT WAS TEST3":
"MATCH NOT FOUND"


The end result of running this expression is it will check the MyStringVar contents and try to pick the first match, if the match not found it will produce “Match not found”.


This expression is good for a variable assignment, for a Derived Column transformation one should use:


[MyStringVar] == "TEST1" ? "IT WAS TEST1": 
[MyStringVar] == "TEST2" ? "IT WAS TEST2": 
[MyStringVar] == "TEST3" ? "IT WAS TEST3":
"MATCH NOT FOUND"


It is easy to expand this expression further to more choices by just adding lines before the last assignment.
Tuesday, June 28, 2011

How to capture a Header or Trailer Count Value in a Flat File and Assign to a Variable

Recently I had several questions concerning how to process files that carry a header and trailer in them. Typically those files are a product of data extract from non Microsoft products e.g. Oracle database encompassing various tables data where every row starts with an identifier. For example such a file data record could look like:

HDR,INTF_01,OUT,TEST,3/9/2011 11:23

B1,121156789,DATA TEST DATA,2011-03-09 10:00:00,Y,TEST 18 10:00:44,2011-07-18 10:00:44,Y
B2,TEST DATA,2011-03-18 10:00:44,Y
B3,LEG 1 TEST DATA,TRAN TEST,N

B4,LEG 2 TEST DATA,TRAN TEST,Y

FTR,4,TEST END,3/9/2011 11:27

A developer is normally able to break the records using a Conditional Split Transformation component by employing an expression similar to

Output1 --  SUBSTRING(Output1,1,2) == "B1"

and so on, but often a verification is required after this step to check if the number of data records read corresponds to the number specified in the trailer record of the file.


This portion sometimes stumbles some people so I decided to share what I came up with.


As an aside, I want to mention that the approach I use is slightly more portable than some others I saw because I use a separate DFT that can be copied and pasted into a new SSIS package designer surface or re-used within the same package again and it can survive several trailer/footer records (!).


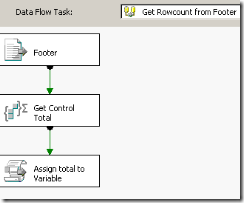
See how a ready DFT can look:


DFT_Composition


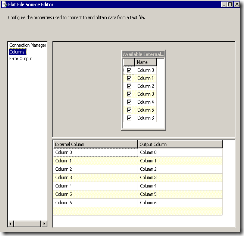
The first step is to create a Flat File Connection Manager and make sure you get the row split into columns like this:


FFS_Columns_Value FFSE_Look


After you are done with the Flat File connection, move onto adding an aggregate which is in use to simply assign a value to a variable (here the aggregate is used to handle the possibility of multiple footers/headers):


Aggr_Editor


The next step is adding a Script Transformation as destination that requires very little coding.


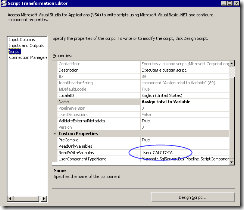
First, some variable setup:


Script_Setup


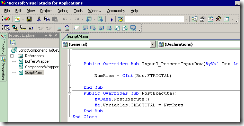
and finally the code:


Script_Code


As you can see it is important to place your code into the appropriate routine in the script, otherwise the end result may not be as expected.


As the last step you would use the regular Script Component to compare the variable value obtained from the DFT above to a package variable value obtained say via a Row Count component to determine if the file being processed has the right number of rows.